This recipe is modified from a recipe my mom shared with me. It has been in our family for years and is an all-time family favorite! The original recipe dates back to the 1961 Betty Crocker Cookbook.
I can’t say enough about this recipe. It conjures up so many special memories and feelings! This cake was my sister’s favorite growing up and she would request it each and every year for her birthday…with strawberries and whipped cream on top! When my mom would make this recipe, she would talk about her own mom (who passed away way too young) and it would put a smile on our faces just hearing her fond stories and recollections. Thinking back on it now, it just warms my heart and I know that’s why it makes me so happy to make this cake – – simply a nostalgic, family treasure that holds oh so many special memories. Using vintage fabrics for this photo shoot as well as antique kitchen utensils passed down, the kids and I tried to recreate this as an homage to my mom and grandma. Love you mom and love that you shared your “LOVE” of baking with us through the years! (A special thank you to my kids for helping stage this photo shoot and offering their hand modeling and light blocking services.)
This recipe has been adapted and specially modified for high altitude and will give you that perfect “mile high” light and airy consistency that we all love in an angel food cake! Perfect for summer!
COOK’S NOTE: There is a fair amount of prep time with a few of the ingredients so please read the recipe carefully and in its entirety before beginning; and prep all of the ingredients beforehand.

Ingredients:
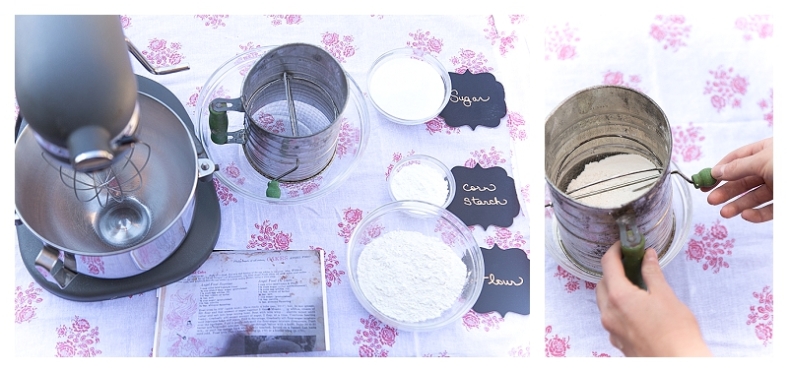
- 1 cup sifted All Purpose Flour plus 2 Tbsp. Corn Starch (Sift 1 cup of Flour and then measure out 1 cup of the sifted Flour. Carefully and precisely remove 2 Tbsp. sifted Flour and then replace removed flour with exactly 2 Tbsp. Corn Starch, and then sift together the flour and corn starch mixture approximately 6-7 times)
- 1 cup Granulated Sugar
- 1 ¾ cup Egg Whites (approximately 12 room temperature Large Eggs)
- 1 ½ tsp. Cream of Tartar
- ¼ tsp. Kosher Salt
- ¾ cup Granulated Sugar
- 1 ½ tsp. Pure Vanilla Extract
- 1 tsp. Pure Almond Extract
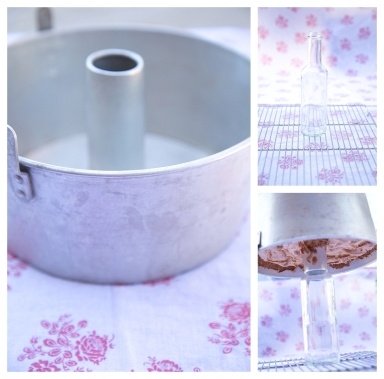
Directions: Preheat oven to 375°. You will need a thoroughly clean 10” angel food cake tube pan with removable center. It is important that the pan be completely dry and free of any oil. When handling the pan, use the upper tabs at the top of the pan instead of holding from bottom as the center tube will pop up if held from the bottom. Set pan aside.


Lay down a large piece of parchment paper (or bowl) with a sifter resting on top of it. Lay down another piece of parchment paper or bowl next to it. Add the 1 cup of flour/corn starch mixture along with 1 cup of sugar to the sifter and sift. Lift up empty sifter and set on top of other piece of parchment paper or bowl. Carefully lift up sides of parchment paper (or bowl) with the sifted flour/sugar mixture and then add to sifter again. Repeat process of sifting 5 times. (Using parchment paper makes it easy to pour the sifted mixture back into the sifter again. You can certainly use a bowl to sift in but it can be tricky to get all the mixture to fall back into the sifter without spilling out.) Set flour/sugar mixture aside. 

Separate approximately 12 room temperature eggs, one by one, until you have 1 ¾ cups of egg whites. The best method to separate eggs is to separate each egg one by one. I know, go ahead and roll your eyes but really it will make your life so much easier if you do. Utilize 2 small bowls plus a 2 cup glass measuring cup. The 1st bowl is used to crack into in order to separate out the eggs whites. The 2nd bowl is where you can add the egg yolks; and the glass measuring cup is where you will want to add each egg white so you can easily measure out 1 ¾ cups. The reason you want to take this approach is so you don’t accidentally get any yolk in with your egg whites as they will not whip properly if you do. Also, let me help you with a common egg shell conundrum that will save your sanity! We have all been there…chasing around a dodging egg shell (or two!) that has found its way into our egg mixture. If this happens to you, all you need to do is wet your pointer finger and place your finger just above where the shell is and it will automatically adhere to your finger and you can draw it up the side of your dish without any chasing involved!
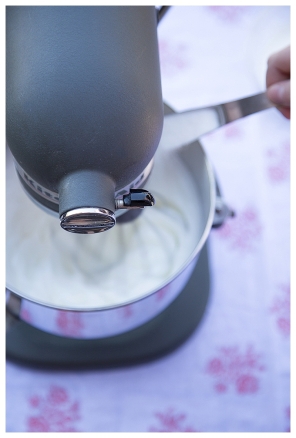
In the bowl of a standard electric mixer using a wire beater attachment, add in measured egg whites, cream of tartar and salt. Beat mixture until extremely foamy and has doubled in size. Once foamy, begin to gradually add in ¾ cup of sugar, 2 Tbsp. at a time. Continue beating until the mixture turns cloudy white and fills the bowl almost to the top and holds “stiff peaks”. You can test to see if the meringue mixture has reached stiff peaks by dipping a clean knife down in and lifting up. If the peaks hold and point straight up, you have the perfect consistency. If they fold down, you will need to whip the mixture a little longer.
Carefully add in precise measurements of vanilla and almond extracts and whip just once or twice to incorporate throughout. Carefully lift parchment paper (or bowl) holding flour/sugar mixture and gently shake approximately ¼ of a cup evenly on top of meringue. Turn mixer back on and whip one or two rotations and quickly shut off. Gradually add remaining flour in the same fashion. Do not overbeat as this will deflate mixture. You just want one or two rotations to incorporate each addition of flour or you can use a spatula and hand fold in the flour until it has disappeared. Either way, it is important not to beat the mixture at this point. You want to keep as much air in the mixture as possible. Using spatula, evenly add meringue mixture to tube pan in a circular motion, rotating pan with each scoop of batter. Once all the batter has been added, take a knife and gently cut through the batter with the knife to remove any air bubbles.


Holding tabs of pan, place pan in preheated 375° oven for approximately 35 minutes or until lightly golden brown. You will know it is done if the top of the cake springs back if you lightly touch it. While baking, set out wire rack with a long neck bottle. When you remove the cake from the oven, immediately place the neck of the bottle into the tube of the pan and invert and let cool upside down. If you let it cool upright, the cake will deflate and lose its height. Let hang until completely cool. This usually takes approximately 1 – 1½ hours so some patience is required but worth the wait.
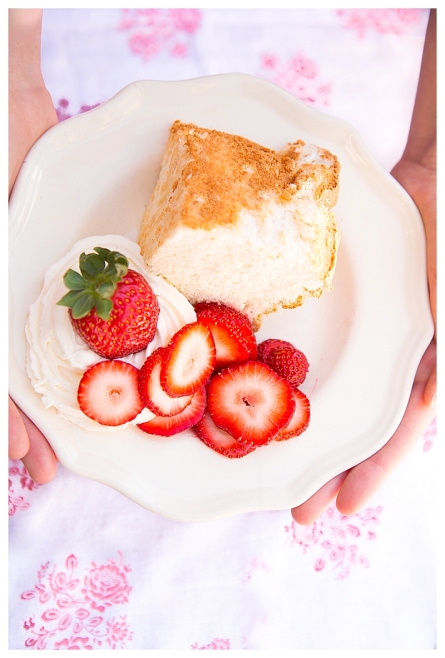
When ready to serve, gently use a serrated knife to cut the cake; otherwise it will deflate when cutting. This cake is perfect served alone without any frosting or to take it up a notch, serve it with cut fresh fruit, such as ripe peaches or strawberries along with a dollop of fresh whipped cream. It is also fantastic with homemade vanilla ice cream! Hope you have enjoyed this step-by-step tutorial of this vintage recipe. Would be happy to offer a Share Class to teach you how to make this amazing cake. If you would like to see a Share Class offered for this recipe or would like to be a “tester” for this recipe, just head to our webpage and click on “Share” and complete the form and send us a message asking us to add an Angel Food Cake class or “add me as a tester”!
You can always find more recipes and posts at Sharing Our Life, Love and Food and follow us on our Facebook by clicking the like button. Help us out by “Sharing” the link and page with others.
Remember to Share your Life, Love and Food with all those around you. You just never know the bond you are creating, the love you are sharing and the memories you are making that will be passed on for generations to come. – Elayne


Oh no, how awful, especially after all that work. Let me help as I make these all the time. There are just a couple of possibilities as to why this happened. When it fell out of the pan, was it fully intact or a splattered mess? If it was a splattered mess, it was underbaked which means you might need to check the internal temperature of your oven. If the flour wasn’t incorporated evenly this can be the result. Other reason, would be large air pockets in the batter that may not have been cut out when using a knife to cut through the batter. I hope some of these help solve the mystery. I know it’s no consolation to have a failed caked on your counter but keep at it. I know not the advice you wanted to hear after going through all those eggs. I have had many failed attempts at things but I am sure this is a recipe that works as it has been used so many times and is much loved. Reach out if I can help more at sharingourlifeloveandfood@gmail.com. We will get this figured out. = )
Made this today for my husband’s bday!! I followed every step to the letter. It turned out perfect & everyone loved it. Thanks Elayne for always sharing your talents, gifts & self with us. This was worth the time.
So glad it was a hit! Did you save a piece for me! = )
Love that they wanted seconds – a sure fire winner!
BTW-the pictures are especially beautiful!!
My family was fortunate enough to be taste testers. I am not an angel food cake fan, but I am now. My kids wanted seconds & we’re not shy about asking. I may need to work on that with them. 😉 It was very very yummy & worth every effort to make. Thanks to you, your mom, & grandma!!